Creating Encaustic & Mixed Media Art
While there are many aspects to creating art, knowing the nuts and bolts of the media are essential to the outcome. While the inspiration dictating the content and potential interpretations of a finished piece are vast and ever evolving, so too, are the mechanics of the creative process; the artist must know the nature and best practices of the materials they work with. I’m going to hone in & briefly describe the 7 steps of how I engineer a mixed media art creation at this point in my creative life.
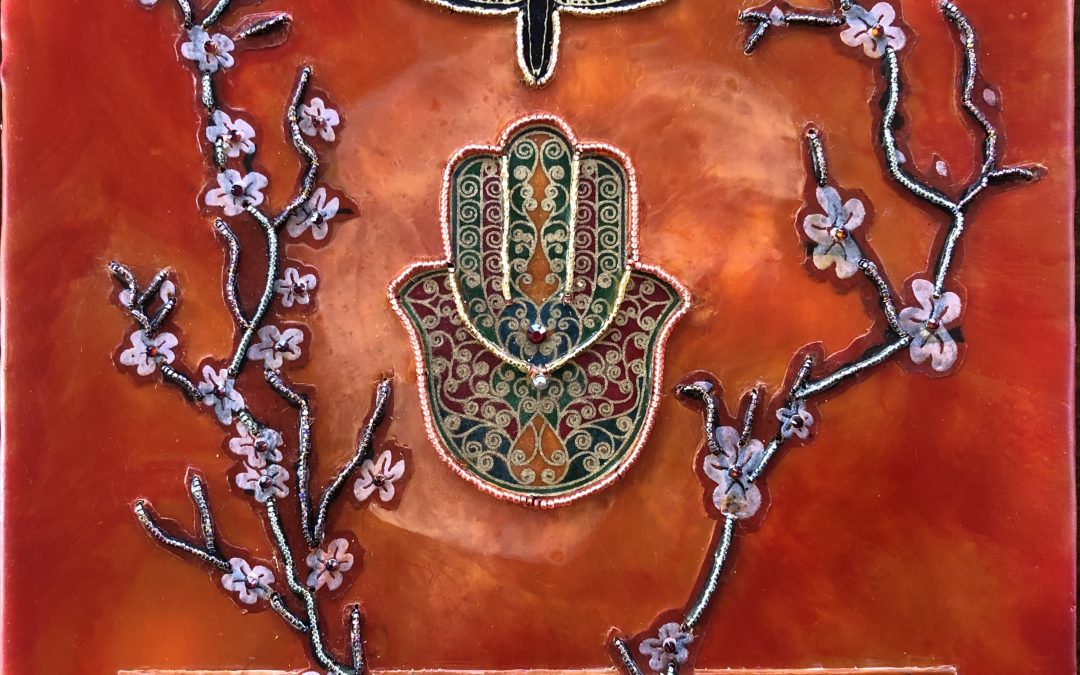
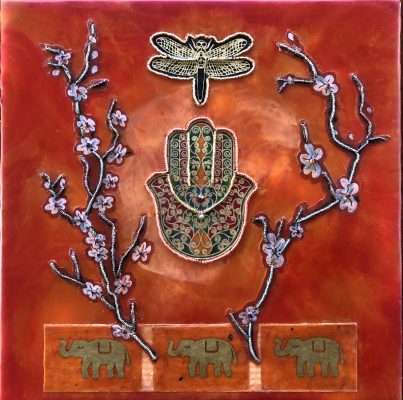
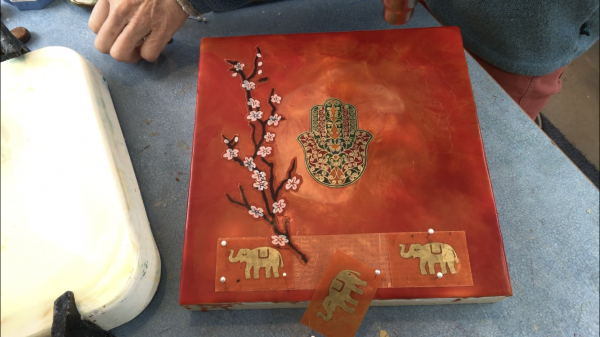
Fires of Creation 1, 10” x 10”, Encaustic & Mixed Media
The steps include:
- Selecting a Substrate
- Layering Waxes
- Preparing Images
- Arranging Images
- Adhering Images
- Adding Beads
- Final Touches
I’ve made a 28-minute video, posted here, that goes into much greater depth. It was inspired by a call from the ‘Laramie Public Arts Coalition’ (LPAC) asking artists to offer up some educational art content for the public; such a gem of an opportunity to expand connection during pandemic isolation. For that I am grateful, and offer here a simple synopsis.
- Substrate: this is simply choosing an appropriate surface upon which the wax and other media are deposited. I use a cradled panel board, because it is rigid and wood easily accepts and holds beeswax. Since I aim to hang the finished work on a wall, this format has edges to which I can easily attach a frame, adding a professional finish.
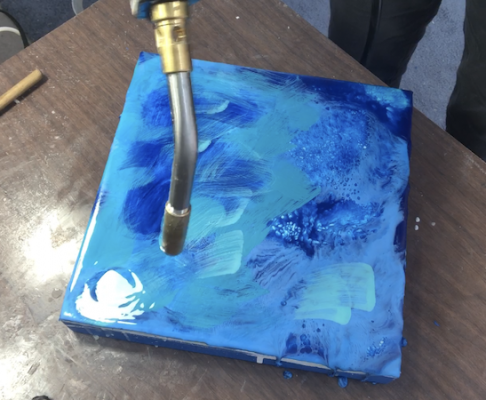 in Layering Waxes: Melted beeswax is ‘painted’ onto the warmed wood surface, and adhered using a blowtorch. Several coats of white or cream-colored beeswax are layered, creating a foundation. Upon that, several more layers of colored waxes are applied and fused; as I get closer to the top, the wax layers include damar, a tree resin that adds hardness and durability.
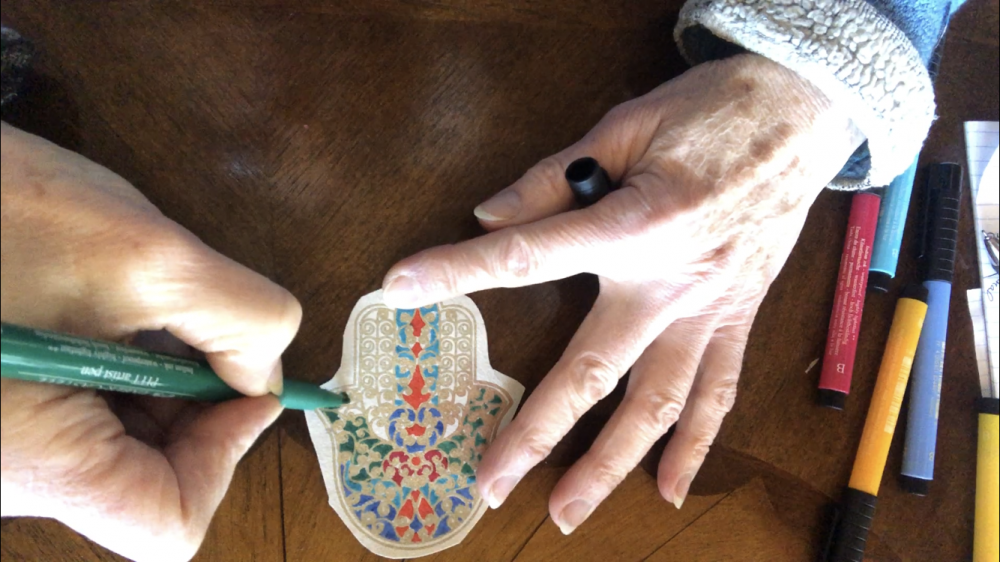 Preparing Images: over time, I’ve created a library of images that speak of the content I’m interested in. Many of these images are altered in a software program, printed on transfer paper, while others are pre-printed on ‘art paper’ (usually hand-made papers from around the world). The latter are then colored-in with felt markers, then waxed on a hot plate and cut to size.
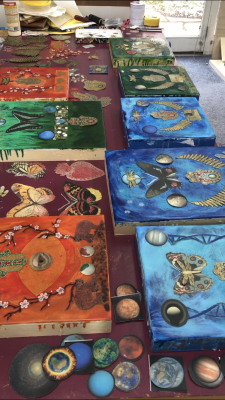
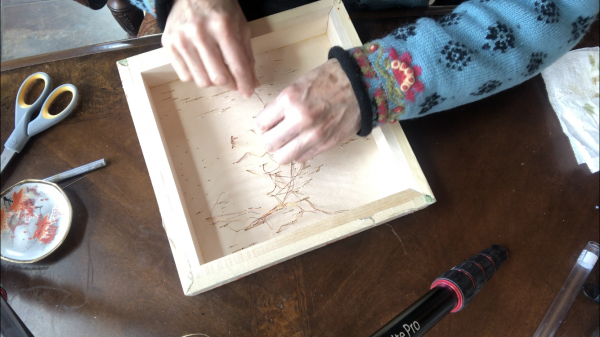
- Arranging Images: with a vast array of images available, I play with various arrangements on to the surface. I typically work with a series of 7 – 10 pieces simultaneously; much like constructing a story, I play with how images are situated within their individual substrate as well how they relate to others in the Series. This is perhaps the most intuitive segment of the working phases of creation.
- Adhering Images: Images are pinned into place, then outlined
 with a pointy pin tool, then removed for surface warming. I use a heat gun for this stage to control how liquid the surface becomes; a layer of clear or white wax medium is applied where an image will go, warmed and then the image is applied and ‘ironed’ on with a flat nib of a craft heating tool.
 Adding Beads: Once cooled, tiny holes are drilled
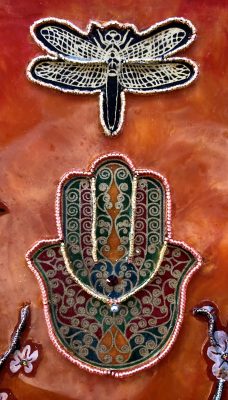
 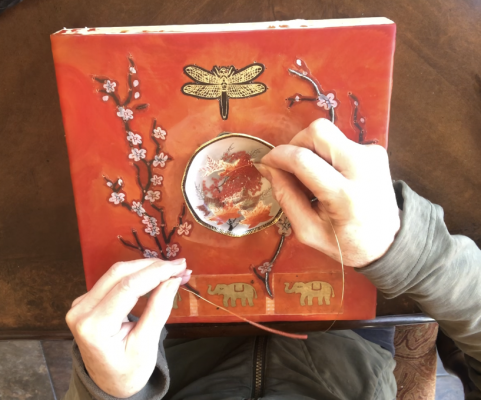 around the contour of an image. Small glass beads are threaded onto thin wire, then adhered into place with a warm stylus nib (of crafting tool). Additional short wires are intermittently cross-threaded over the main beaded thread, through the holes to the backside, securing the line of beads in place.
- Final Touches: The wires projecting through to the back of the panel are secured by twisting them together and tucking them under. Sometimes small Swarovski crystals are glued onto small nail heads placed through drilled holes at purposeful placements. The piece then is framed and a hanging wire securely fastened on the back.
How long does it take to create a piece? Considering the intensive bead work I’ve immersed myself in recently, a small work of 10” x 10” takes about 25-30 hours. This doesn’t account for time spent finding and altering images, or choosing colors or preparing and adding the frame. Such creation, like raising a child, is definitely an act of love, over and over – which is what I hope you experience when you experience the work.
Remember, you can watch the video with audio detailing the process here. Please, let me know what you think, and if you have any questions in the comments box below.
Such a labour of love…I can feel your enthusiasm and passion. And doing several at once! Art from the Heart moves beyond space and time. Beautiful work and now an even deeper appreciation for the knowledge of the steps and processes. Thank you for Sharing your Love!
Ah, yes indeed a labor of love; albeit when it is a meditation of Love, it doesn’t feel like a labor in the ‘arduous’ lineage of the word… time and focus are essential, and I’m so grateful to have the luxury of both. Thank you for watching and sending feedback.